In this Article
- Why Standard Tack Fails the Off-Track Standardbred
- Accommodating the Pacer's Unique Shoulder Sweep
- Managing the Hollow Back Transition Phase
- Distributing Rider Weight Across Unconditioned Muscles
- Field Walkthrough: Fitting a Freshly Retired Pacer
Why Standard Tack Fails the Off-Track Standardbred
A saddle that perfectly fits a typical riding horse will often cause immediate back soreness in an off-track Standardbred. The root of this issue lies in the intense, highly specific physical conditioning required for harness racing. Years spent pulling a sulky at high speeds fundamentally alter the horse's musculature. Harness racing builds massive pushing and pulling muscles in the hindquarters and shoulders. Meanwhile, the topline remains largely underdeveloped because the horse has never been asked to carry dead weight on its back.
Applying standard saddle fitting rules to a horse fresh off the track ignores this specialized musculoskeletal development. Drawing on initial assessments of off-track pacers, fitters realized that the driving-to-riding transition required prioritizing the overdeveloped pushing muscles of the hindquarters over the underdeveloped weight-carrying topline. Early attempts to use standard warmblood templates for wither tracings were quickly discarded. Those templates assume a balanced distribution of muscle mass that simply does not exist in a horse that has spent its formative years in a harness.
The result is a highly specialized musculoskeletal system—one that actively rejects conventional saddle trees. When a standard tree is placed on a newly retired Standardbred, it typically perches on the overdeveloped shoulders while entirely missing the contours of the back. This creates severe pressure points at the front of the saddle, leading to restricted movement, behavioral resistance, and acute soreness. Recognizing this imbalance is the mandatory first step in transitioning a horse from the track to the riding arena.
Accommodating the Pacer's Unique Shoulder Sweep
The repetitive trotting or pacing action in a harness alters shoulder muscling in ways that directly impact saddle fit. A Standardbred's shoulder must reach forward and pull back with immense force, creating a thicker, more pronounced muscle structure around the scapula. The specific trajectory of the Standardbred scapula requires a wider tree point clearance than what is typically seen in warmbloods or stock breeds.
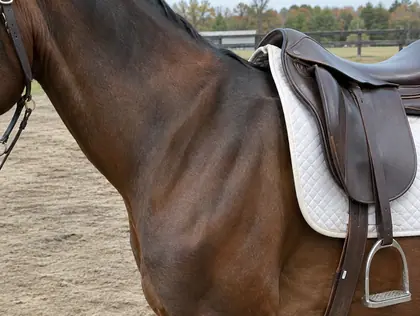
To map this exact backward rotation, fitters trace the scapular cartilage during a simulated pacing stride. This dynamic measurement ensures the tree points are angled to accommodate the wider, flatter trajectory unique to harness racing veterans. The data from these tracings consistently shows a need for 1.5 to 2 inches of additional tree point clearance compared to a standard trotting warmblood. Without this extra room, the saddle will physically block the shoulder blade as it rotates backward during the stride.
Restrictive tree points impede the horse's ability to transition from a driving frame to a riding frame. A horse experiencing shoulder pinch will hollow its back, raise its head, and refuse to step under itself with its hind legs. Providing optimal clearance allows the scapula to slide freely beneath the front of the saddle. This freedom of movement encourages the horse to lower its neck, lift its back, and begin developing the correct muscles for carrying a rider.
Managing the Hollow Back Transition Phase
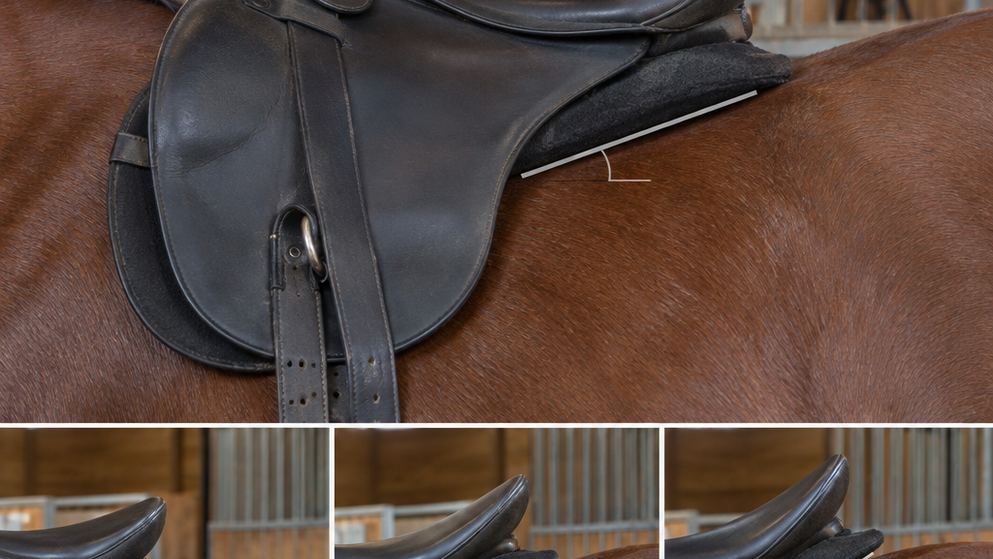
The hollow back phase, lasting on the order of 4 to 6 months after off-track retirement, presents the most significant challenge for saddle fitters. During this period, the horse is losing its racing muscle but has not yet built its riding muscle. The area just behind the withers often appears sunken, lacking the protective bulk of the longissimus dorsi. Because of this temporary anatomy, saddles frequently bridge, making contact only at the withers and the cantle while leaving a visible gap in the middle of the back.
Bridging concentrates the entire weight of the rider onto four small points, causing severe discomfort. To counteract this, fitters employ a strategic use of shims and corrective padding. The padding strategy is adjusted bi-weekly by mapping the hollow areas behind the scapula, adding tapered foam shims to fill the void without pinching the spinal processes. This creates an artificial bridge of support, allowing the saddle panels to distribute weight evenly across the back.
Transitional Padding Strategy
Relying on corrective shims to bridge a hollow back is strictly a transitional measure for the first six months of retraining, as prolonged use under a fundamentally mismatched tree will permanently stunt the development of the longissimus dorsi.
As the horse begins to work correctly under saddle, the muscles will slowly fill in. The bi-weekly mapping ensures that shims are gradually reduced as the horse's own muscle replaces the foam. Failing to remove the shims as the back changes will eventually create the very pressure points the padding was originally designed to prevent.
Distributing Rider Weight Across Unconditioned Muscles
Standardbred back conformation varies wildly depending on breeding lines, ranging from prominent A-frame withers to flatter, mutton-withered shapes. Evaluating panel angles against this specific conformation is critical for a horse that has never carried a rider. The goal is to maximize the surface area bearing the downward pressure, protecting the unconditioned muscles from localized trauma.
Evaluators press a flexible curve ruler along the longissimus dorsi to determine the exact roof angle of the back. This measurement dictates the required angle of the saddle panels. Selecting broad, flat panels is a proven method to distribute rider weight safely over muscles that are just beginning to adapt to their new job. If the panels are too angled (tent-shaped) on a flat back, they will dig into the horse's spine. If they are too flat on an A-frame back, they will pinch the outside edges of the muscle.
The longissimus dorsi and trapezius muscles bear the brunt of the saddle's weight. In an off-track Standardbred, these muscles are highly susceptible to fatigue and bruising. Broad panels act like snowshoes, spreading the load over a larger footprint. This careful distribution of weight encourages the horse to relax its back and swing through its body, rather than bracing against the unfamiliar pressure of a rider.
Field Walkthrough: Fitting a Freshly Retired Pacer
Evaluating a saddle for a horse straight off the track requires a methodical, hands-on approach. This process isolates static fit from dynamic movement, ensuring the tack supports the horse through every phase of its stride.
Step 1: The Static Bare-Back Evaluation
Place the saddle directly on the horse's back without any pads. Position it slightly forward over the withers, then slide it backward until it naturally stops behind the shoulder blades. Check for exactly three fingers of wither clearance (approximately 2.25 inches) between the pommel and the top of the horse's spine. Next, run your flat hand under the panels from front to back. You must feel continuous, even pressure along the entire length of the longissimus dorsi. If your hand encounters a loose gap in the middle, the saddle is bridging. If it gets pinched tightly at the back, the tree is too curvy for the horse's topline.
Step 2: The Dynamic Lunge Line Test
Girth the saddle snugly and attach a lunge line. Send the horse out at a trot and, if they offer it, their natural pace. Watch the cantle of the saddle closely. It should remain relatively stable, moving in harmony with the horse's back. If the saddle bounces violently off the horse's back at the trot, the tree is too straight. If the saddle slides forward onto the shoulders or slips sideways during the pacing stride, the tree points are likely too narrow, forcing the saddle up and out of position as the scapula rotates.
Step 3: The Post-Ride Sweat Pattern Analysis
Tack the horse up with a thin, solid-colored cotton pad and conduct a 20-minute walk/trot ride. Focus on maintaining a steady rhythm rather than asking for complex transitions. Immediately upon dismounting, remove the saddle and pad to examine the sweat pattern on the horse's back. You are looking for perfect symmetry. During the post-ride evaluation, the fitter examines the sweat pattern symmetry, specifically looking for dry patches under the stirrup bars which indicate localized pressure points that require immediate flocking adjustments. A healthy sweat pattern will show even moisture along the saddle's footprint, with a clear, dry channel directly over the spine.